Showing posts with label wood. Show all posts

How To Build a Loft Bed

When my wife and I moved back to NYC last year, our new apartment was still packed to the gills despite some significant downsizing. Since we moved into a turn-of-the-century brownstone in Brooklyn with high ceilings, a loft bed with plenty of storage space seemed ideal. After our wedding, we promised to treat ourselves to a brand new queen-sized tempurpedic mattress.

The hunt was on, but after some local inquiries, we discovered that major furniture stores simply don't carry queen-sized loft beds. They can be special-ordered, but only at great expense. The more I looked at pictures online of loft beds, the more confident I was that I could design and build one myself. Soon I found myself designing what would become the largest and heaviest object I had ever built (and one that had to be sturdy enough to hold two adults and three cats for several hours at a time).

I erred on the safe side, and overbuilt the heck out of it. I planned on using 2x6's and 2x4s for the framing, and plywood for the mattress platform, and put together with bolts, nuts, and washers.

My father and grandfather both spent time as draftsmen at some point in their careers, so I suddenly found myself with a board set up with graph paper, meticulously laying the bed out to scale in three dimensions.
Untitled

The construction itself took a lot more time and effort than I anticipated (this is always the case), especially hoisting the heavy bedframe up onto its 5.5 foot tall legs.
2011-07-02 21.51.25

In the end it worked out wonderfully - sturdy, clean, with about 160 cubic feet of storage space!
2011-07-02 21.51.02

This past month we moved yet again, so I broke the bed down into pieces the movers could handle. Since our new place has lower ceilings, and we've downsized even more in the past year, I chopped the legs down to a more reasonable height. It still has plenty of space underneath, but climbing into bed isn't as much of an ordeal.

Enjoy this stop motion video I took of the bed's reconstruction. It was hot as the dickens while I was doing it, and I was a bit reticent about putting a video up of me in shorts and an undershirt. But then I read this article about ITP students vs. MIT Media Lab students and figured f*ck it. Enjoy!


The song accompanying the video above is called "Green Thumb" written by the lovely Ann Courtney (now frontwoman of the band Mother Feather). I helped arrange and engineer this tune in 2005.

Scrapwood Box, String, and Text: "Provenance"

A couple of months I covered the construction of a scrapwood box I've been using to keep materials in. The hacked together look made it an oddity amongst my other functional furniture pieces I've made before.

It occurred to me to turn it into a piece of artwork because I've been investigating this connection between the inherent intrigue in an apparatus that's idiosyncratically constructed for something purely functional or whimsical. Exposing the parts, accentuating ugliness, has been something I've been pushing more and more in my work.

To go even a step further with this, I catalogued the story of every single piece of wood I used in the box. It turns out they fell into groupings because they were scrap pieces from several different projects I've worked on. I mapped all of the pieces into short descriptions on paper by tacking strings from each piece to it's corresponding story. Thus when looking at the piece, one can learn the provenance of each component that went into it.

Repairing a Vintage Hohner Harmonica Case

My Grandfather bought a Hohner Chromonika while serving in World War II (ironically, a German brand). When I was a child I had my own little blues harp, and seeing that I had an interest in it, he gave me his harmonica, in a lovely finger-jointed wood box.

Being a child at the time, I was a bit rough on the whole kit, and the box ended up broken with a couple of the pieces lost. I took the time recently to fabricate new finger-jointed pieces, and attach a new pair of hinges. Here's how the build went:

P1010023

The Harmonica Case and the blank I cut from scrap stock.

P1010026

I used the dremel to cut out the finger joints, after scrolling the existing joints on the box. Some adjustments were necessary to get a tight fit.

P1010034

The joints were attached with wood glue, and clamped for drying.

P1010042

I jacked these hinges off a box that I hardly use. They're pretty weathered, and a decent fit.

P1010045

P1010051

I'm happy with the results, and glad I was able to try this detail work with the dremel.

Workshop Tour


After a feverish build session on the "Bounce Announce" project, I trashed the workshop and re-organized in the aftermath. This is probably the cleanest it's going to get for months, so I decided to document it.

The "Bounce Announce" instrument will be completed by Sunday, at which time I will post video of it in action. If you'd like to see it (and lots of other awesome projects) live, make sure to go to the ITP Winter Show.

Scrap Wood Shelves Featured in Stop Motion Animation

Last week, my classmate Will Jennings and I created this whimsical stop motion video at ITP using my scrapwood shelves, and their assorted corresponding knick-knacks. We created it using IStopMotion, which is a fantastic program if you're looking to do that sort of thing. Enjoy!

Pez ZomBie from William Jennings on Vimeo.

Mighty Cat Scratching Post

Mister Blackie Tests the Scratching Post
I've been a cat owner for a while, and (through research and patience) have found the solution to keeping feline friends from ripping apart my couch.

Half the battle is in giving your cats a sturdy scratching post - nice and tall so they can stretch out, bottom heavy so it won't tip over, and made of something they can dig into, like sisal hemp.

I saw the opportunity to build these when visiting the Tilly Foster Farm in Brewster NY, where they happened to be demoing a host of antique farm equipment engines. One of the exhibits was a working 2 horsepower dragsaw, slicing cookies off a giant tree limb. The owner was letting people take the cookies for free, so I helped myself to two.

These became the bases for my mammoth scratching posts.

First I drilled out and cut a nice big circular hole in the center using my jigsaw.
Mighty Cat Scratching Post

Then I traced an identical circular piece out of plywood, with which I could attach the actual post (2x4s with the corners cut, then wrapped and stapled with 1/2" sisal rope) with screws. Once done, I drilled some nice beefy screws diagonally into the piece of tree limb to keep it steady, making sure to countersink the screws and fill in all the gaps with my homemade wood filler (screened sawdust and wood glue).
Mighty Cat Scratching Post

Next I thought up a novel way to make the tops of the post look nice, because they had just the end strand of the sisal stapled to the top - not too aesthetically pleasing and not too pleasant for cats either. So I found a smaller branch that was the same diameter, and cut it to size, making sure to make a crevice for the sisal to sit (first sketched out with a sharpie, then routed out with a spade bit and a rasp bit)
Mighty Cat Scratching Post


Liked it so much I built another!
Mighty Cat Scratching Post

Report from the Cold Spring Craft Fair

Report from the Craft Fair
For it being our first craft fair, it went very well. We weren't concerned with making money, so much as observing people's reactions to our creations.


The scrapwood shelves turned a lot of heads, but a lot of the time there would be a man being interested in them and his wife pulling him away. :) But I did sell one piece, to a happy Martin W (who works for a NYC design firm, and is keeping my card on file - yippee!) pictured here. When he bought it he said he won't "ruin it by putting knick-knacks on it."
Report from the Craft Fair


Does this make me an artist? One woman said my shelves reminded her of Louise Nevelson, and when I admitted to not knowing who that was, she said "shame on you!" I tried explaining to her that I'm not an artist - this was just something I like to do, but this didn't seem to quell her agitation. All the same I take it as a compliment. It led me to check out Nevelson's work, which I really dig! And read this quote from her:


"When you put together things that other people have thrown out, you’re really bringing them to life – a spiritual life that surpasses the life for which they were originally created."


I can run with that...

Scrapwood Shelving for Knick-Knacks and Tchotchkes

P1030931

My wife, Melody and I have been hard at work all this week in preparation for the Cold Spring River Festival. Melody designs and sews some awesome and hilarious apparel, and I'll be selling all different sorts of things made from recycled and repurposed materials.


It doesn't take me a lot of time to accumulate all sorts of scrap lumber from different projects, and I can't bear to see it go to waste, so I designed and built these shelf units that are perfect for keeping your odds and ends and action figures and bric-a-brac that you don't know what to do with.


I tried to make everything look a bit less hacked together by filling in the gaps (with homemade wood filler made from screened sawdust and wood glue) with a putty knife, shaping it with the jigsaw, and sanding everything down.


I've got some other tricks up my sleeve for our table at the festival, but I really do hope a couple of these pieces sell.
P1030930
P1030933
P1030932

The Story of My Sockets

Homemade Customized Socket Organizer
People come into tools for all different reasons - you might have the $40,000 super precision Snap-On Set, or the Chinese plastic molded toolkit you bought in Bushwick when you were scraping by as a college student. Maybe you've inherited some tools - maybe you've bought some specifically for a job, and even today when digging around you can still recall the exact circumstances in which you were made to acquire it.


For most of us it's a combination of all these things, and probably more. This motley set of sockets has come into my possession through many miles and at least a couple of generations. It was always my father's habit to throw his sockets into a box and go hunting for the right one when necessary. But I had just organized my drill bit collection (just as motley, and organized just the same way-back-when by my father) and wanted to put it to use.


I dumped out all the sockets and separated them by metric (aqua) and English (natural) units, then organized by size. After drilling the right sized holes for each piece, I had fashioned my very own socket organizer, perfectly tailored for my needs. It cost nothing but the few pieces of scrap wood I had, and if I ever acquire more sockets I can just cut out the parts I need to change - keep it ever-evolving. And by the way, I'll always remember that the aqua bits were from the picket gate I rescued from the trash to make tomato stakes with.


The easy route would have been to go to sears and buy the super-duper socket set and make sure to keep it organized, but this way I can append some pride to the whole matter - make do with my own design, and come to find that I'm actually the better for it. Now these sockets rest in a drawer in a dentist's cabinet in my basement (scored that gem with the marble base for 50 bucks at a barn sale). Again, it's a matter of seeking the alternative for the better, not just to settle for less, but to push for more! This is what "pushing the other button" is all about. When something seems too easy, or you're not quite getting the satisfaction from your work or yourself you think you should, go ahead and try the other thing - push the other button. You could surprise yourself with what happens...

"Ohm Sweet Ohm" Decorative Plaque

ohmsweetohm2
A while back I received a plaque saying "Home is Where Your Story Begins." It was just a bit too kitschy and corny for display in our home, but I didn't want a gift to go to waste, so I re-imagined it with a geeky twist.

"Ohm Sweet Ohm" - complete with the Omega symbol and a lightning bolt is much more our style. I made it by masking over the entire plaque and then cutting out the letters with an x-acto, making an adhesive stencil. Hit it with some silver spraypaint (boy do I love spraypaint) and voila - geektastic!

Artistic Interpretation of The Cube Root of Three

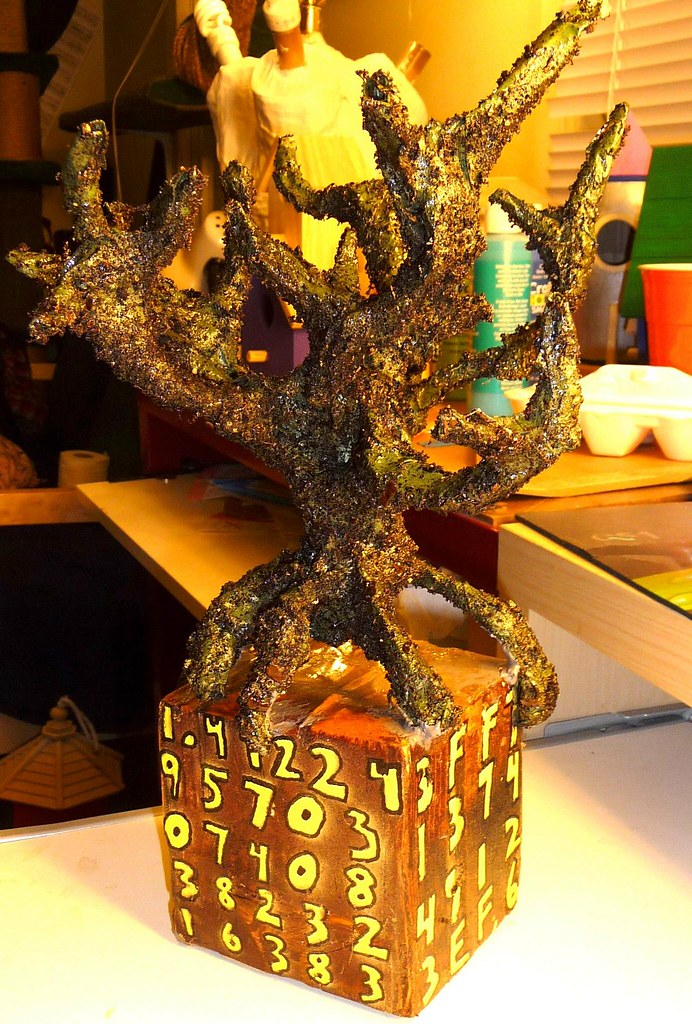
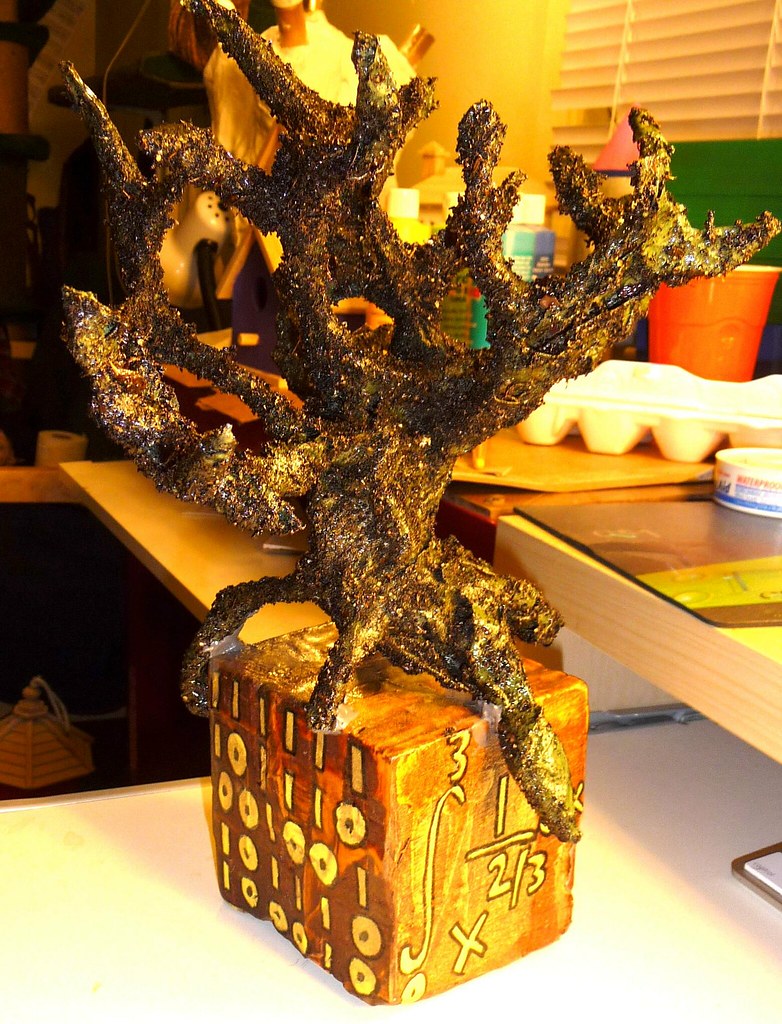
     My wonderful sister is a high school math teacher, and in our family the geek apple doesn't fall too far from the tree. With that in mind, I made this extra-special birthday present for her this past year. For a native New Yorker you might pronounce this "Da Cube Root o Tree" - It's a wire frame papier mache tree sitting atop a wood cube, with the cube root of three expressed in different ways on the four visible facets of the cube - decimal, hexadecimal, binary, and integral (click here for pic showing the other two facets).
     For the cube, not only did I not have a thick enough piece of wood available, but I was eager to experiment with a method of scrap wood laminating I read on Lifehacker a while back. With wood glue, clamps, and varnish, I was able to make a durable, interesting looking cube for the base. I then stenciled and spray painted the letters and numbers, and spray-lacquered the whole thing.
      For the tree, I shaped a wire frame, then covered it in papier mache - old school, like in kindergarten with water, white glue, and newspaper. After applying green spraypaint and letting it dry, I hit the tree with some 3M Super 77 spray adhesive, and rolled it around in soil. After brushing off the loose bits, I lacquered it several times to keep it all together.
     Epoxy holds the two pieces together, and now it sits on my sister's desk, awaiting the curiosity and/or bewilderment of her students.

Recycling Plastic Bags into Childrens' Blocks

I learned about the method of "stewing" plastic bags from this instructable a while back, and decided to try it for myself.  In short, it's done by placing the bags in canola oil, in which they acquire a gummy consistency, suitable for molding into rigid pieces. I decided to make some childrens' blocks out of it. As far as I know the plastic is all #2 HDPE which I assume is safe for children. Can anyone shed some light on this? (don't worry I wouldn't give this to kids until I'm absolutely sure).

The swirly, marbled patterns have potential, although just mixing all the different colors together make it ugly as sin. Perhaps in the future I'll use various color schemes and they'll come out nicer.

On further thought, what basically gets created from this process is plastic lumber . Perhaps I can hang onto all my #2 plastic and slowly make enough plastic bricks to build a house. :) or even better, raid the bins on recycling day and live within other peoples' waste. Oh the possibilities....

Check out build pics at my flickr page.

Thinking Inside the Box

     I'm a pretty decent wood butcher - have slapped together a compost bin, workbench, shelves, even an adirondack chair made of shipping pallets. But what I've never tried to do is a carpentry project that fits edges together snugly, where everything is perfectly square, and it looks somewhat decent (like a wood surgeon would do it?)
     So, after feeling restless and watching this video, in which Adam Savage claims to start going a bit nuts if he isn't regularly building something, I made it an afternoon project to construct a simple, clean, elegant wooden box.
    I must give infinite respect to my friends who are carpenters. It is an art that takes a lot of practice to do well. I feel like my box will hold up for a while, but it ain't the prettiest, nor the straightest thing in the world. All the same, I learned a bit while making it, so it's all good.

Scrapwood Trellis


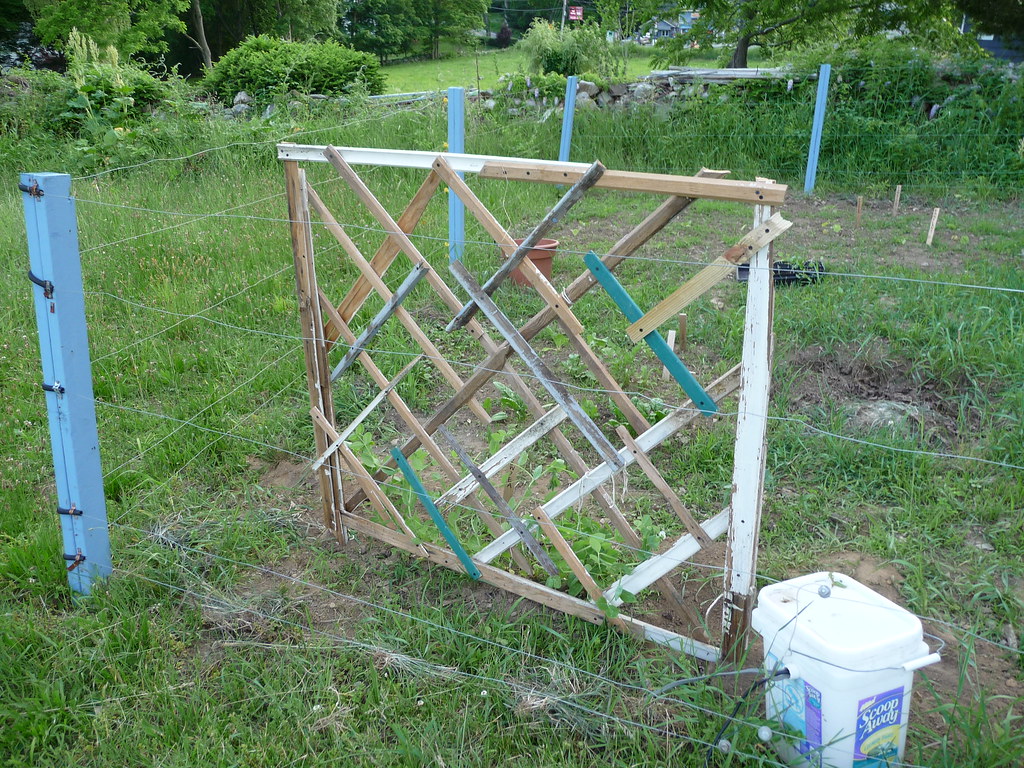
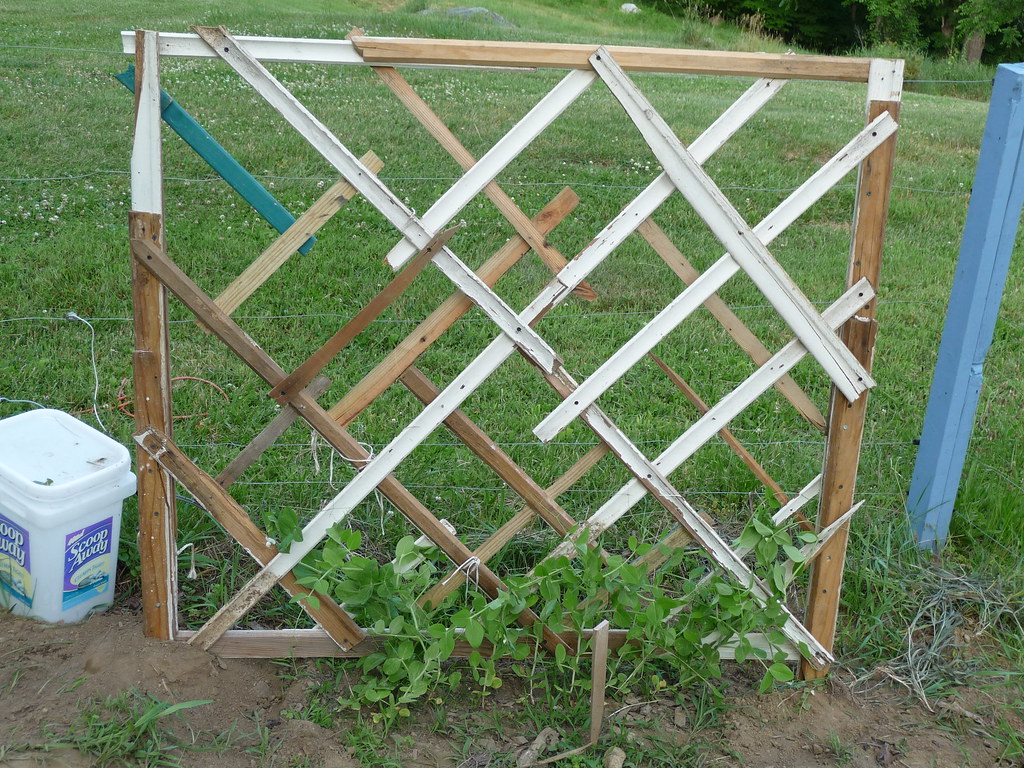
It's June and the plants are going vertical for sure now. Our snow peas needed some help with their ascent so I put together this trellis from scraps I have lying around. Kept my Triangle Square (def my fav new tool) out on the ground while framing it up. The design looks haphazard but keeping everything at right and 45 degree angles makes it coalesce I think.

Wood Gasification Stove Saves the Day!

The blizzard that hit the northeast states recently left many without power, running water, or heat. I was one of the many who found myself in this predicament, envying those neighbors of mine with generators. Luckily, my homemade wood gasification stove, fashioned from tin cans, saw me through the worst parts. One of these is super easy to make, and I was inspired by this simple instructional video:


When my wife and I awoke the first morning after the storm hit and were still without electricity, I loaded the stove up with scrapwood, grabbed the grill from our toaster oven, and brewed some espresso in the Moka Pot.

Then Melody started work on breakfast - scrambled eggs and toast! We cooked it up on the living room floor, just making sure to keep the stove on top of a few ceramic plates for heat dissipation. Be sure you're adequately ventilated when using one of these stoves- these gasses are not so safe to breathe in large quantities.

After nightfall the house would get really chilly so we curled up and played some scrabble or listened to the radio, generating heat with the stove one batch at a time. By breaking up the combustion process into discrete parts, this stove generates an even, virtually smokeless heat. All that's left at the end is a small pile of ash. All you need is a squirt of lighter fluid or rubbing alcohol to get it started. If you have trees nearby you'll be with heat for a long time. This thing can run on twigs!

The next plan is to build an even bigger one with a longer burn time. It was a drag to have to reload the little guy- introducing fresh wood to a live batch seems to disturb the gasification process and generates smoke. A coffee can sized stove would burn for quite a while.