Showing posts with label assemblage. Show all posts
Showing posts with label assemblage. Show all posts
"Fruit Powered" Sound Sculpture
This was constructed from an obscure piece of aeronautical hardware I procured at the Pratt and Whitney Surplus Store in Hartford CT. I snaked stainless steel wire from it to act as resonators. Then at key points I installed piezo transducers. At the center the stainless steel wires stab into a banana and a pear. The whole works sits atop a speaker that the transducers constantly feed back.
Standing waves appear on the floor surrounding the piece and viewers' position and footsteps alter the resulting drone.


Making a Mouthpiece Fit My Horn
Recently I made an exquisite trade through Craig's list - 5 beat up student violins and a student model trumpet, in exchange for a 90 year old Alto Horn. Since acquiring it I've played it a whole lot.
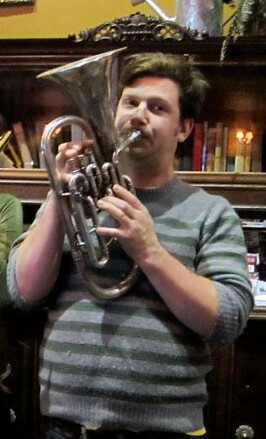
The problem was, the mouthpiece that came with it was for a mellophone, which has a shaft size that's too small for the alto horn. I set about increasing the shaft size instead of holding it together with scotch tape.
First I covered the mouthpiece shaft with a liberal amount of JB-WELD. Initially I thought it would be possible to sand it down by hand to a cylindrical shape, but this proved to be difficult.
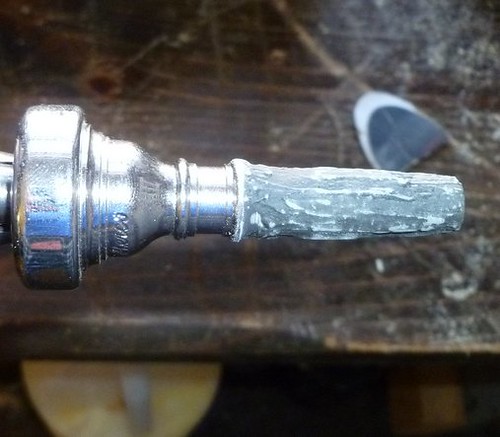
My next idea was to sand while it was turning, as on a lathe. This required finding just the right size bolt and nut to secure the mouthpiece, but once done I was able to mount it in my hand drill. which I then mounted in my bench vise.

Then it was just a matter of sanding it down while the drill ran. I'm quite happy with the results, and glad I didn't have to go out and buy a new mouthpiece.
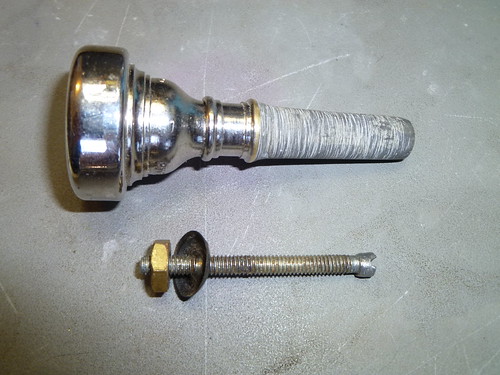
The problem was, the mouthpiece that came with it was for a mellophone, which has a shaft size that's too small for the alto horn. I set about increasing the shaft size instead of holding it together with scotch tape.
First I covered the mouthpiece shaft with a liberal amount of JB-WELD. Initially I thought it would be possible to sand it down by hand to a cylindrical shape, but this proved to be difficult.
My next idea was to sand while it was turning, as on a lathe. This required finding just the right size bolt and nut to secure the mouthpiece, but once done I was able to mount it in my hand drill. which I then mounted in my bench vise.
Then it was just a matter of sanding it down while the drill ran. I'm quite happy with the results, and glad I didn't have to go out and buy a new mouthpiece.
"Bounce Announce" Visualization Element
I've decided to take the Bounce Announce project and add visualization to it utilizing piezo sensors and processing. Every instrument will have a piezo trigger attached to it, that will be processed by Arduino and fed to a Processing visualization sketch.
On a projected backdrop, the effect should appear to be differently colored expanding concentric circles that originate from each impact point.

On a projected backdrop, the effect should appear to be differently colored expanding concentric circles that originate from each impact point.
Moonisphere Rising
Contrary to popular belief, the moon (at least for one weekend) is not made of cheese...
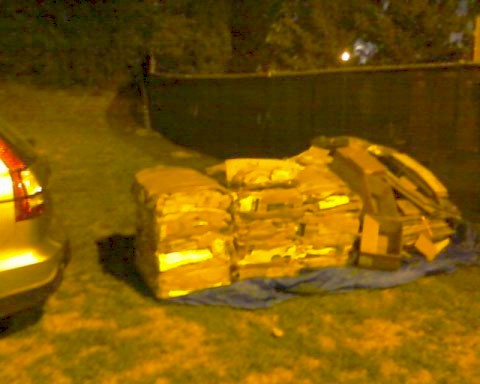
The Moonisphere build begins today at Maker Faire.
The Moonisphere build begins today at Maker Faire.
Lamp Assembled from Drum Hardware and a Car Jack
Had this one kicking around for a while - it originally featured a boom arm for better adjustability, but this made it top-heavy - so it's now a humble, but neat-o straight desk lamp (though still somewhat adjustable).
As usual, I had all these things on hand being all lonely and useless. The blue rick-rack on the shade is courtesy of Melody, scored at an estate sale last month. Enjoy!
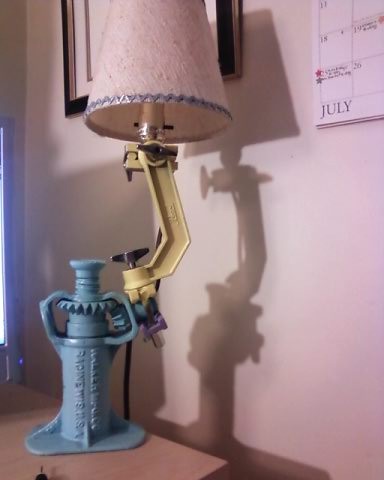
As usual, I had all these things on hand being all lonely and useless. The blue rick-rack on the shade is courtesy of Melody, scored at an estate sale last month. Enjoy!
Report from the Cold Spring Craft Fair

For it being our first craft fair, it went very well. We weren't concerned with making money, so much as observing people's reactions to our creations.
The scrapwood shelves turned a lot of heads, but a lot of the time there would be a man being interested in them and his wife pulling him away. :) But I did sell one piece, to a happy Martin W (who works for a NYC design firm, and is keeping my card on file - yippee!) pictured here. When he bought it he said he won't "ruin it by putting knick-knacks on it."
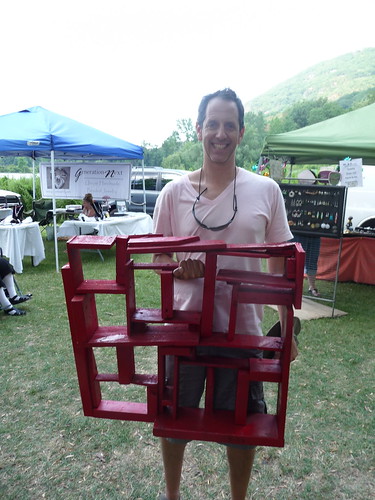
Does this make me an artist? One woman said my shelves reminded her of Louise Nevelson, and when I admitted to not knowing who that was, she said "shame on you!" I tried explaining to her that I'm not an artist - this was just something I like to do, but this didn't seem to quell her agitation. All the same I take it as a compliment. It led me to check out Nevelson's work, which I really dig! And read this quote from her:
"When you put together things that other people have thrown out, you’re really bringing them to life – a spiritual life that surpasses the life for which they were originally created."
I can run with that...
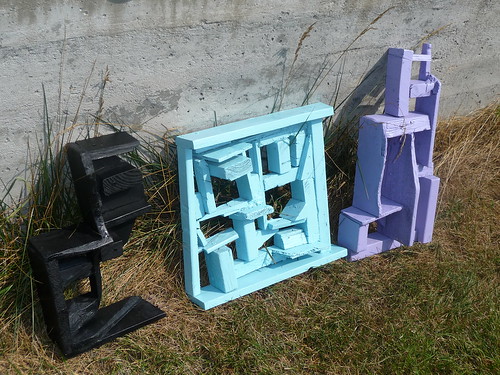
Scrapwood Shelving for Knick-Knacks and Tchotchkes

My wife, Melody and I have been hard at work all this week in preparation for the Cold Spring River Festival. Melody designs and sews some awesome and hilarious apparel, and I'll be selling all different sorts of things made from recycled and repurposed materials.
It doesn't take me a lot of time to accumulate all sorts of scrap lumber from different projects, and I can't bear to see it go to waste, so I designed and built these shelf units that are perfect for keeping your odds and ends and action figures and bric-a-brac that you don't know what to do with.
I tried to make everything look a bit less hacked together by filling in the gaps (with homemade wood filler made from screened sawdust and wood glue) with a putty knife, shaping it with the jigsaw, and sanding everything down.
I've got some other tricks up my sleeve for our table at the festival, but I really do hope a couple of these pieces sell.


Evaporative Cooler Update!
Methinks the evaporative cooling set-up did it's job just fine! Between 11:00 to 1:20 the inside temperature creeped from 85 F to 90 F and has held steady since then (writing this at 3:30). I'm calling this a not-too-shabby success, since the outdoor temperature climbed from 91 to 97 in the same amount of time.

So I didn't quite reach the wet-bulb temperature of 84, but here I am writing this entry - a bit balmy, but if it were 97 indoors I'd probably have passed out before finishing this paragraph :)
Lots of thanks to Make: Magazine for featuring this project!
So I didn't quite reach the wet-bulb temperature of 84, but here I am writing this entry - a bit balmy, but if it were 97 indoors I'd probably have passed out before finishing this paragraph :)
Lots of thanks to Make: Magazine for featuring this project!
"Ohm Sweet Ohm" Decorative Plaque

A while back I received a plaque saying "Home is Where Your Story Begins." It was just a bit too kitschy and corny for display in our home, but I didn't want a gift to go to waste, so I re-imagined it with a geeky twist.
"Ohm Sweet Ohm" - complete with the Omega symbol and a lightning bolt is much more our style. I made it by masking over the entire plaque and then cutting out the letters with an x-acto, making an adhesive stencil. Hit it with some silver spraypaint (boy do I love spraypaint) and voila - geektastic!
Papercraft (Cardboard Craft?) Pizza Box Robot Monster
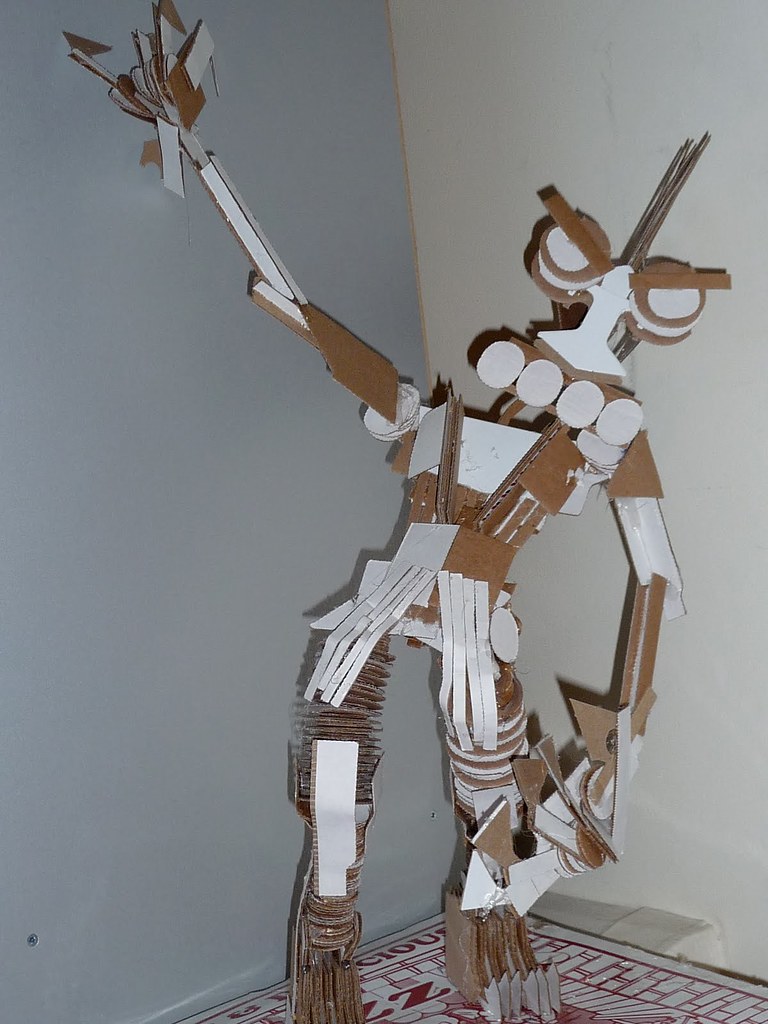
Recently, due to the hard economic times, I was forced to take a job as a pizza delivery driver to make ends meet. The work was tedious, but allowed my mind to wander to some productive places. I came up with some great ideas while assembling hundreds and hundreds of boxes in the basement. Leaving myself voicemails made Google Voice the perfect repository for my pizzeria pipe dreams.
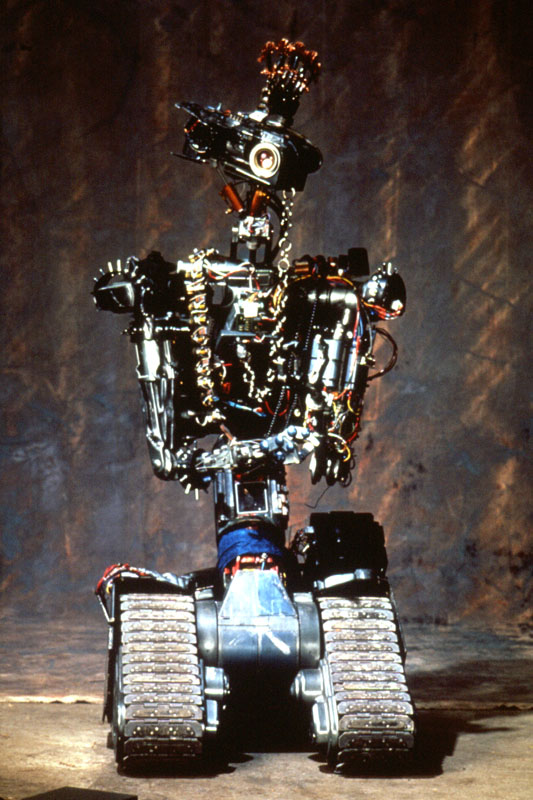
I'm guessing that pizza boxes are generally die-cut, and as is common in this process, the excess cuttings were sometimes still partially attached to the boxes in all manner of interesting shapes. To pass the time I started collecting them and thinking about what I could make with them. It soon became apparent that I had enough to assemble a mighty creature who could become a menacing mascot for the pizzeria. After four months of steady collecting, I had enough and put this guy together. Though not intended, I think he may be a cross between The Cybernetic Ghost of Christmas Past From the Future from Aqua Teen Hungerforce, and bad-ass Johnny Five from Short Circuit 2 after he re-assembles himself in the radio shack.
 Alas, the pizza gig is over, and they did not adopt it as their official mascot. If you work at, or know of a pizzeria in the NYC area that might be interested in displaying my robot on their counter, leave a note in the comments.
Artistic Interpretation of The Cube Root of Three
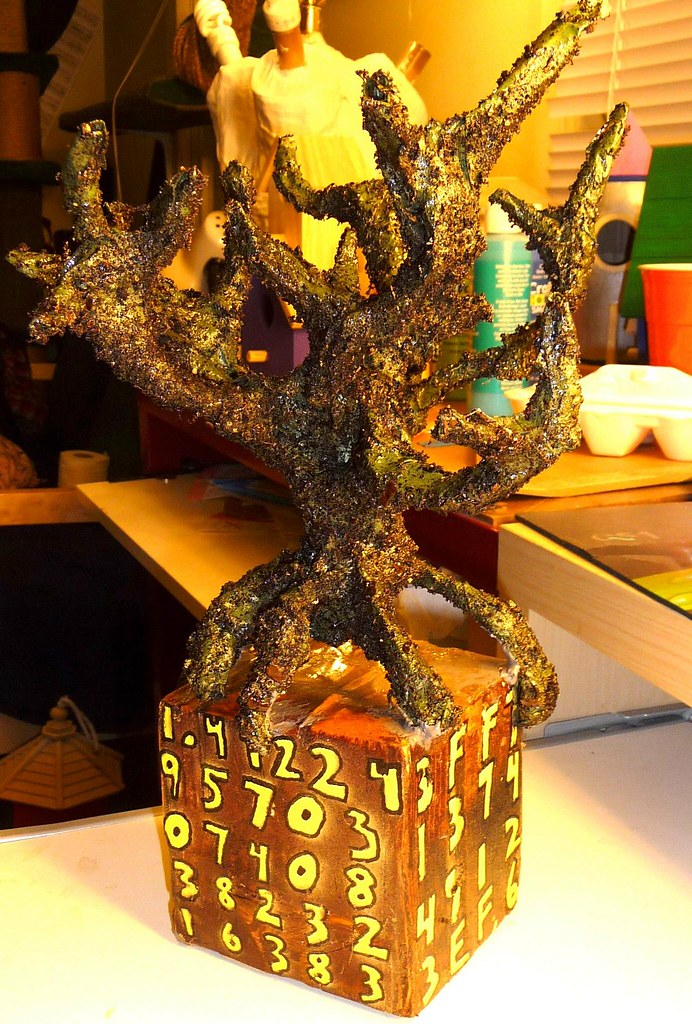 My wonderful sister is a high school math teacher, and in our family the geek apple doesn't fall too far from the tree. With that in mind, I made this extra-special birthday present for her this past year. For a native New Yorker you might pronounce this "Da Cube Root o Tree" - It's a wire frame papier mache tree sitting atop a wood cube, with the cube root of three expressed in different ways on the four visible facets of the cube - decimal, hexadecimal, binary, and integral (click here for pic showing the other two facets).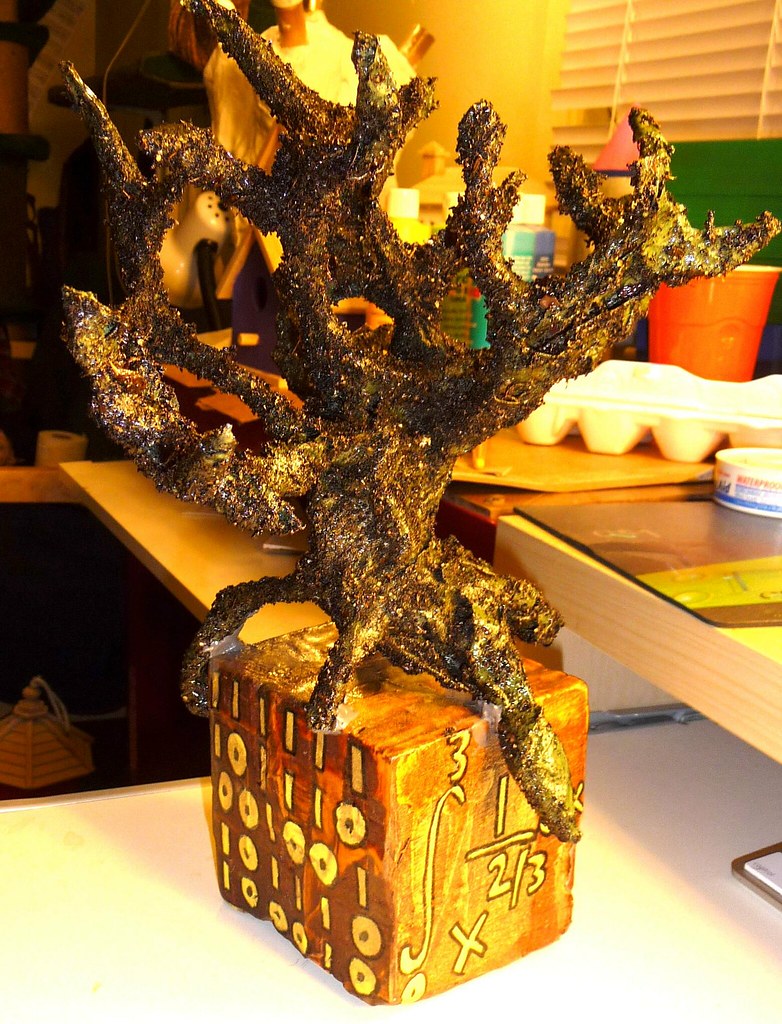
For the cube, not only did I not have a thick enough piece of wood available, but I was eager to experiment with a method of scrap wood laminating I read on Lifehacker a while back. With wood glue, clamps, and varnish, I was able to make a durable, interesting looking cube for the base. I then stenciled and spray painted the letters and numbers, and spray-lacquered the whole thing.
For the tree, I shaped a wire frame, then covered it in papier mache - old school, like in kindergarten with water, white glue, and newspaper. After applying green spraypaint and letting it dry, I hit the tree with some 3M Super 77 spray adhesive, and rolled it around in soil. After brushing off the loose bits, I lacquered it several times to keep it all together.
Epoxy holds the two pieces together, and now it sits on my sister's desk, awaiting the curiosity and/or bewilderment of her students.
The Tapescape Audio Robot
 Keeping in the spirit of this blog, I should mention that I'm the co-creator of a robot that was built almost solely from a dual tape deck and could transmit sound from a "scape" of "tape" as it rolled along. This was called TapeScape -
After moving out of NYC after my tenure as bassist for Kinetic was over, this was the first major "maker" project I undertook with my collaborator, Ilan Schifter (who encouraged me to enroll at NYU's ITP program.) We originally entered the robot into an Instructables contest, and then received attention from several well-known blogs.
It was after this that the gears started turning for this website idea. It excites me immensely to know that there is "obsolete" technology and materials languishing, just waiting for others like myself to snatch it up and re-imagine it as something fantastic!
If you have ideas along these lines, I'd love to hear what you've been doing. If you have something laying around and don't know what to do with it, let me know, and we can think of something. Cheers!
Recycling Plastic Bags into Childrens' Blocks
I learned about the method of "stewing" plastic bags from this instructable a while back, and decided to try it for myself. In short, it's done by placing the bags in canola oil, in which they acquire a gummy consistency, suitable for molding into rigid pieces. I decided to make some childrens' blocks out of it. As far as I know the plastic is all #2 HDPE which I assume is safe for children. Can anyone shed some light on this? (don't worry I wouldn't give this to kids until I'm absolutely sure).
 The swirly, marbled patterns have potential, although just mixing all the different colors together make it ugly as sin. Perhaps in the future I'll use various color schemes and they'll come out nicer.
On further thought, what basically gets created from this process is plastic lumber . Perhaps I can hang onto all my #2 plastic and slowly make enough plastic bricks to build a house. :) or even better, raid the bins on recycling day and live within other peoples' waste. Oh the possibilities....
Check out build pics at my flickr page.
The swirly, marbled patterns have potential, although just mixing all the different colors together make it ugly as sin. Perhaps in the future I'll use various color schemes and they'll come out nicer.On further thought, what basically gets created from this process is plastic lumber . Perhaps I can hang onto all my #2 plastic and slowly make enough plastic bricks to build a house. :) or even better, raid the bins on recycling day and live within other peoples' waste. Oh the possibilities....
Check out build pics at my flickr page.
Thinking Inside the Box
 I'm a pretty decent wood butcher - have slapped together a compost bin, workbench, shelves, even an adirondack chair made of shipping pallets. But what I've never tried to do is a carpentry project that fits edges together snugly, where everything is perfectly square, and it looks somewhat decent (like a wood surgeon would do it?)
So, after feeling restless and watching this video, in which Adam Savage claims to start going a bit nuts if he isn't regularly building something, I made it an afternoon project to construct a simple, clean, elegant wooden box.
I must give infinite respect to my friends who are carpenters. It is an art that takes a lot of practice to do well. I feel like my box will hold up for a while, but it ain't the prettiest, nor the straightest thing in the world. All the same, I learned a bit while making it, so it's all good.
What's it Worth to You?
One of my favorite quotes is, "You tell me 'Looks like someone has too much time on their hands,' but all I hear is 'I don't know what it feels like to be creative.'"
Every day we experience a conscious state taking up what Clay Shirky calls cognitive surplus. In two nights' worth of TV time (watching the NBA finals game 1 last night, and a TV movie this night) I've organized all of my loose hardware: nuts, bolts, nails, screws, washers, and whatever else I might dive into for inspiration from time to time.
One on side, I paid less attention to what I was watching on the tube. But how much attentions do we really pay to the act of watching television anyway?
Every day we experience a conscious state taking up what Clay Shirky calls cognitive surplus. In two nights' worth of TV time (watching the NBA finals game 1 last night, and a TV movie this night) I've organized all of my loose hardware: nuts, bolts, nails, screws, washers, and whatever else I might dive into for inspiration from time to time.
One on side, I paid less attention to what I was watching on the tube. But how much attentions do we really pay to the act of watching television anyway?
Now the tip: sorting hardware is a devious task when you feel like you've gotten so much accomplished, but it's really just because you sorted the big stuff first. Then it's a marathon of drudgery and fine motor exercise. When you're down to a handful of fluff and the tiniest of pieces, I suggest throwing it all in a tin can, going outside, and burning it from a safe distance with a splash of accelerant (isopropyl, gasoline, kero, what have you...).
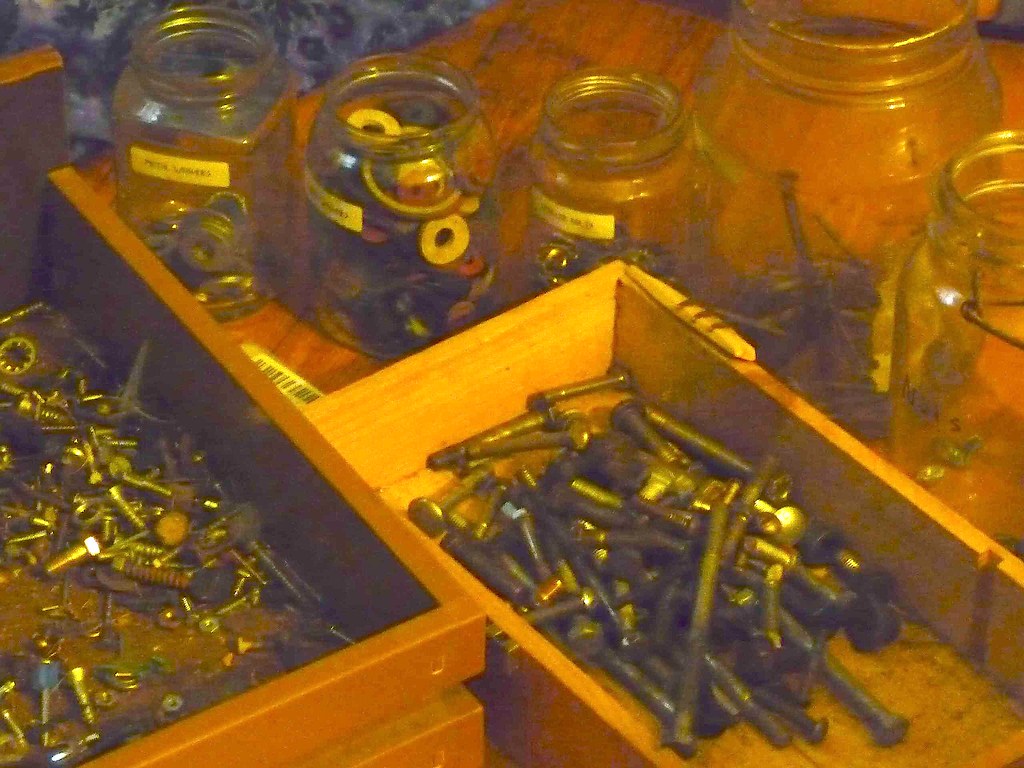
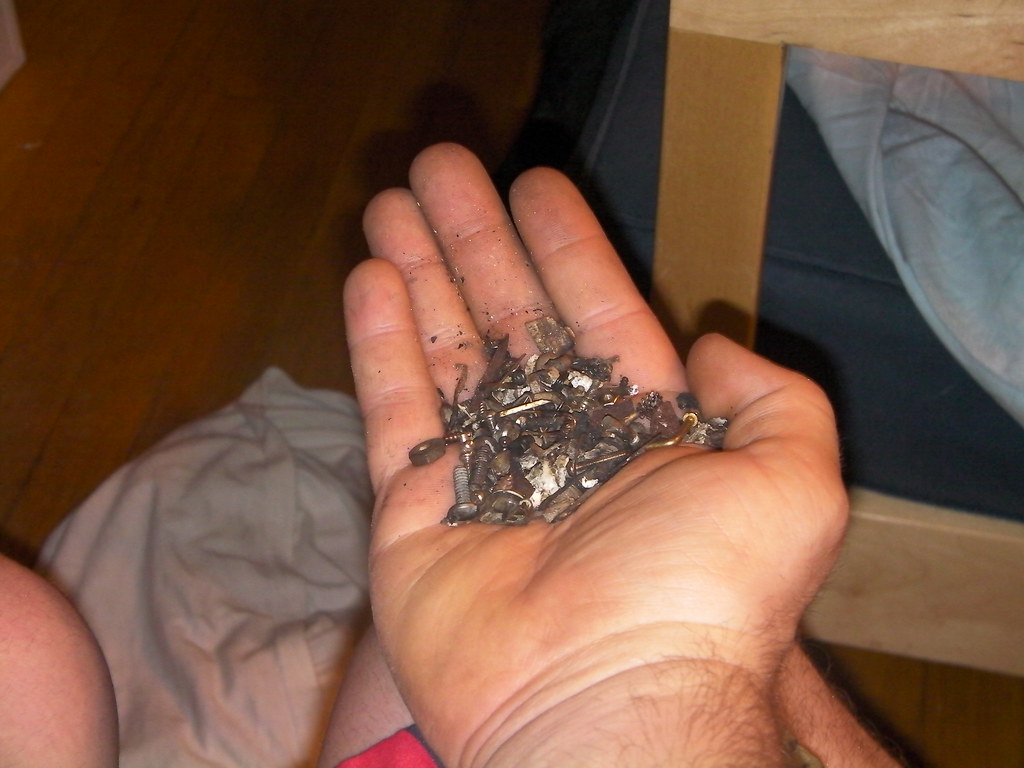
Once you're finished, dump it onto the pavement, blow away the ash, and scoop up the spoils!
Subscribe to:
Posts (Atom)