Showing posts with label recycled. Show all posts

Making Candles from Scrap Wax

Some of you may remember how my wife Melody and I had to scrape through 4 days without electricity last winter when we lived in our cottage.

Of course we busted out every last candle in the house and used up nearly all of them too! As you know, sometimes candles come in a nice little all-encompassing jar that catches and burns nearly all the wax. Then there are others that don't have receptacles, and can end up making an unholy mess, terminating their lives as frozen, gelatinous blobs that get tossed in the trash.

I've hung on to all that leftover wax and recently melted it all down to make a new candle with it!

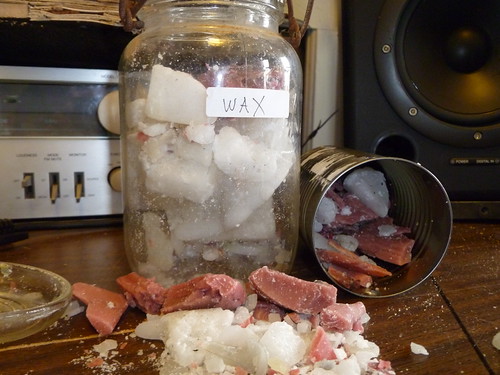
Here's the scrap wax I started with.
Making a Candle from Scrap Wax

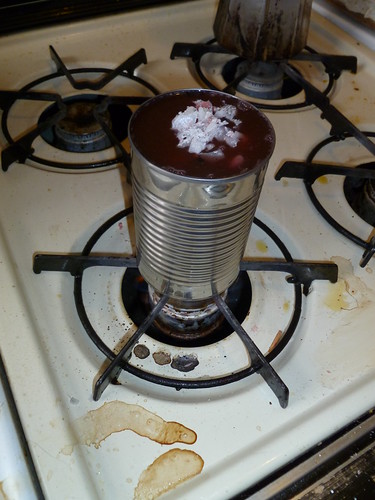
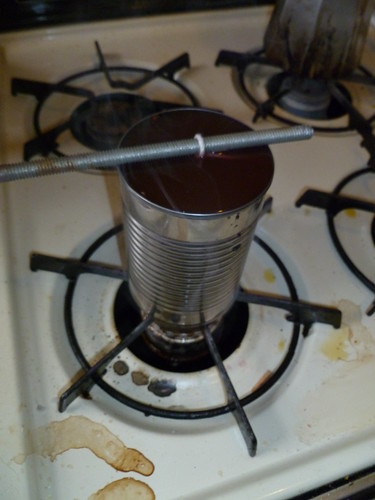
Then I put it all in a standard aluminum can and set it on the stove to melt.
Making a Candle from Scrap Wax

I hung a piece of cotton string in the liquid wax.
Making a Candle from Scrap Wax

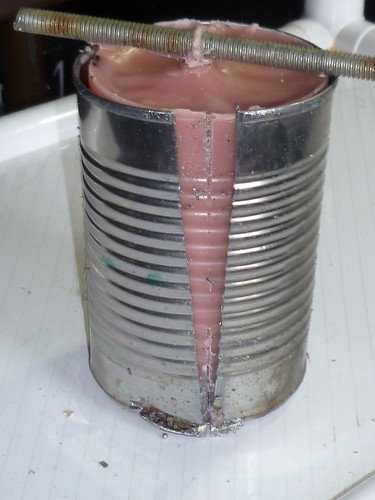
When it had solidified (this takes several hours) I cut the can open with a hacksaw.
Making a Candle from Scrap Wax


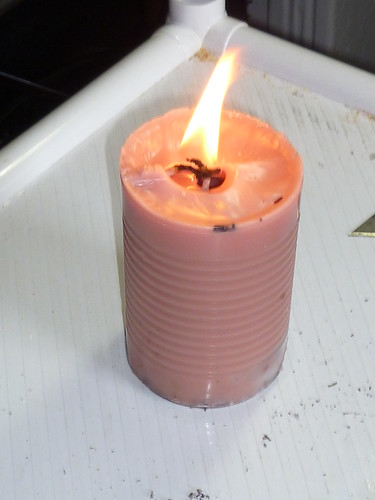
Now I have a beautiful, fragrant, candle!
Making a Candle from Scrap Wax

Scrap Wood Shelves Featured in Stop Motion Animation

Last week, my classmate Will Jennings and I created this whimsical stop motion video at ITP using my scrapwood shelves, and their assorted corresponding knick-knacks. We created it using IStopMotion, which is a fantastic program if you're looking to do that sort of thing. Enjoy!

Pez ZomBie from William Jennings on Vimeo.

Maker Faire Day 2 - Moonisphere is Too Big to Fail

Recycled Cardboard Moonisphere Under Construction

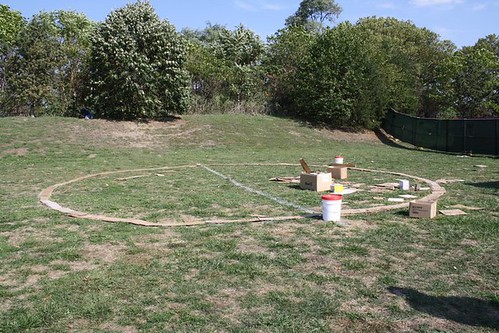
After a sweltering day building the Moonisphere on day one, so far we have merely a Moonicircle, but fear not! We were able to do a lot of prep work in the shade, cutting massive amounts of cardboard into appropriately sized strips to lay down.

Once the framework is made, we'll cut slots with a jigsaw, and fit it all together like an old-fashioned barn raising.

The crew from the New York Hall of Science has been great at redirecting all of their waste cardboard to our pile, and there will be plenty of cardboard from wolphram-alpha swag integrated into the Moonisphere.

If you find yourself passing by our tent, give a hand in constructing a wicked cool piece of temporary art! We're right by the 3d printers at Maker Faire, all day today.

Fantasy Project - Junk Pedal Scrambler!

Lots of guitarists collect effects pedals, and lots of effects pedals end up being set aside, never to be seen again in a guitarist's rigs. This invention aims to take advantage of that trend. It consists of a series of effects loops that are cycled through sequentially, with each loop having controls for clean/effected blend, and on/off - each loop can contain one or more effects pedals, the rate at which they cycle through can be varied by a knob, and the overall blend between clean signal and effected signal can also be adjusted.

I really want to make a prototype of this, but do not have the skills to do it. Here's a mock-up.
Junk Pedal Scrambler

Mighty Cat Scratching Post

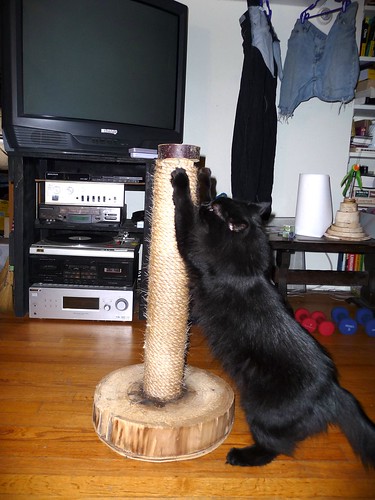
Mister Blackie Tests the Scratching Post
I've been a cat owner for a while, and (through research and patience) have found the solution to keeping feline friends from ripping apart my couch.

Half the battle is in giving your cats a sturdy scratching post - nice and tall so they can stretch out, bottom heavy so it won't tip over, and made of something they can dig into, like sisal hemp.

I saw the opportunity to build these when visiting the Tilly Foster Farm in Brewster NY, where they happened to be demoing a host of antique farm equipment engines. One of the exhibits was a working 2 horsepower dragsaw, slicing cookies off a giant tree limb. The owner was letting people take the cookies for free, so I helped myself to two.

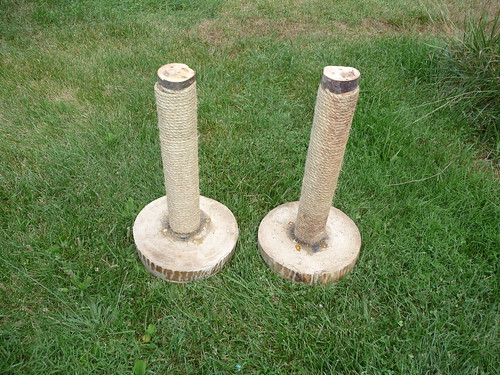
These became the bases for my mammoth scratching posts.

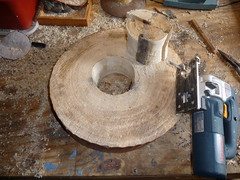
First I drilled out and cut a nice big circular hole in the center using my jigsaw.
Mighty Cat Scratching Post

Then I traced an identical circular piece out of plywood, with which I could attach the actual post (2x4s with the corners cut, then wrapped and stapled with 1/2" sisal rope) with screws. Once done, I drilled some nice beefy screws diagonally into the piece of tree limb to keep it steady, making sure to countersink the screws and fill in all the gaps with my homemade wood filler (screened sawdust and wood glue).
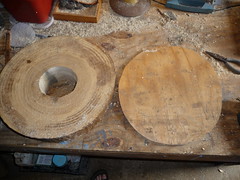
Mighty Cat Scratching Post

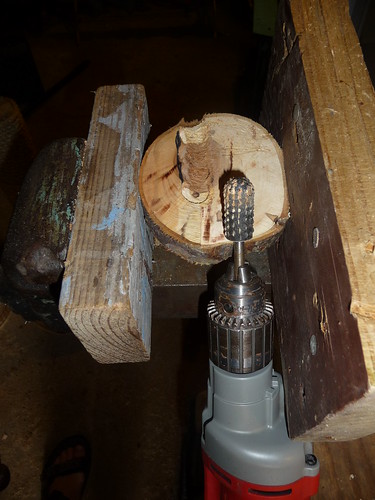
Next I thought up a novel way to make the tops of the post look nice, because they had just the end strand of the sisal stapled to the top - not too aesthetically pleasing and not too pleasant for cats either. So I found a smaller branch that was the same diameter, and cut it to size, making sure to make a crevice for the sisal to sit (first sketched out with a sharpie, then routed out with a spade bit and a rasp bit)
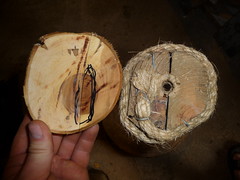
Mighty Cat Scratching Post


Liked it so much I built another!
Mighty Cat Scratching Post

Frankenstein Guitar Amplifier Build

I'm moving from the country to the city soon, and have been making a steady attempt to consolidate and downsize beforehand.


I've had several dead and dying guitar amplifiers in my workshop for quite some time, and I had ruminated enough on how I was going to hack them all together into something unique. So, check out the pic and video of it below, and be sure to read the
instructable for some more detail about how this was all done.


Frankenstein Guitar Amp Build


Frankenstein Guitar Amp Build - More DIY How To Projects

Lamp Assembled from Drum Hardware and a Car Jack

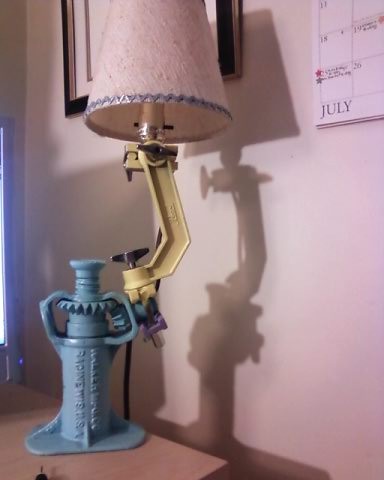
Had this one kicking around for a while - it originally featured a boom arm for better adjustability, but this made it top-heavy - so it's now a humble, but neat-o straight desk lamp (though still somewhat adjustable).


As usual, I had all these things on hand being all lonely and useless. The blue rick-rack on the shade is courtesy of Melody, scored at an estate sale last month. Enjoy!

Lamp

Report from the Cold Spring Craft Fair

Report from the Craft Fair
For it being our first craft fair, it went very well. We weren't concerned with making money, so much as observing people's reactions to our creations.


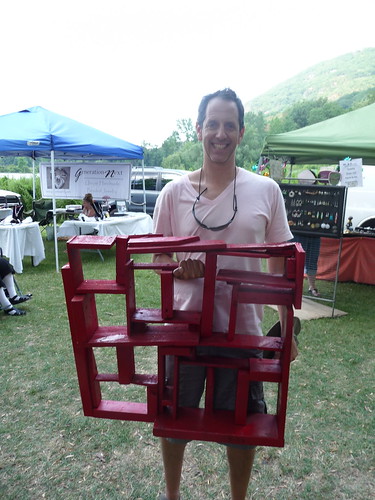
The scrapwood shelves turned a lot of heads, but a lot of the time there would be a man being interested in them and his wife pulling him away. :) But I did sell one piece, to a happy Martin W (who works for a NYC design firm, and is keeping my card on file - yippee!) pictured here. When he bought it he said he won't "ruin it by putting knick-knacks on it."
Report from the Craft Fair


Does this make me an artist? One woman said my shelves reminded her of Louise Nevelson, and when I admitted to not knowing who that was, she said "shame on you!" I tried explaining to her that I'm not an artist - this was just something I like to do, but this didn't seem to quell her agitation. All the same I take it as a compliment. It led me to check out Nevelson's work, which I really dig! And read this quote from her:


"When you put together things that other people have thrown out, you’re really bringing them to life – a spiritual life that surpasses the life for which they were originally created."


I can run with that...

Scrapwood Shelving for Knick-Knacks and Tchotchkes

P1030931

My wife, Melody and I have been hard at work all this week in preparation for the Cold Spring River Festival. Melody designs and sews some awesome and hilarious apparel, and I'll be selling all different sorts of things made from recycled and repurposed materials.


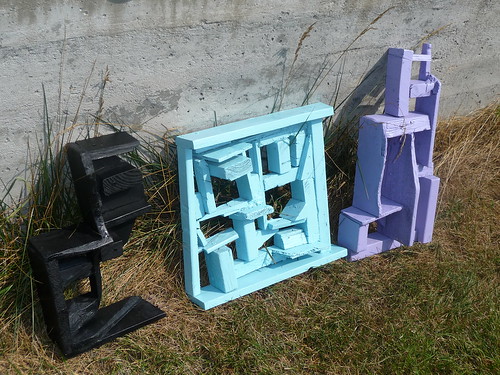
It doesn't take me a lot of time to accumulate all sorts of scrap lumber from different projects, and I can't bear to see it go to waste, so I designed and built these shelf units that are perfect for keeping your odds and ends and action figures and bric-a-brac that you don't know what to do with.


I tried to make everything look a bit less hacked together by filling in the gaps (with homemade wood filler made from screened sawdust and wood glue) with a putty knife, shaping it with the jigsaw, and sanding everything down.


I've got some other tricks up my sleeve for our table at the festival, but I really do hope a couple of these pieces sell.
P1030930
P1030933
P1030932

DIY Evaporative Cooling in a Heat Wave

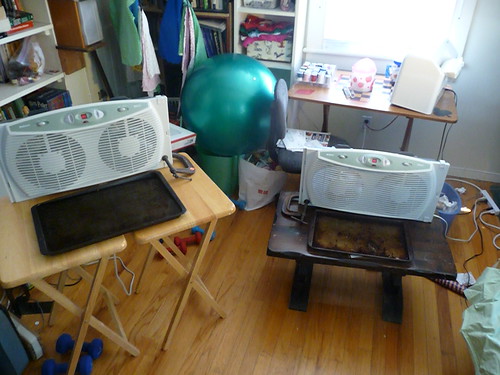
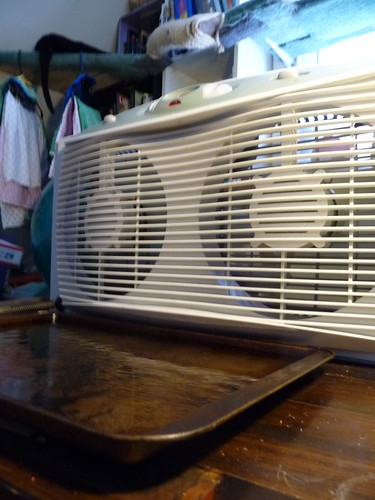
At home, we only have A/C units on the second floor, and I do most of my work on the Mac, which is on the first floor. Yesterday the New York metro area wasn't just hot, it was Africa Hot, and today looks to be more of the same, but I've got work to do. This morning I lowered all the blinds in an attempt to keep the heat out, and set up the window fans on tables with shallow baking pans full of water in front of them. The idea is that the air flowing from the fans will evaporate the water and cool down the room.

DIY Evaporative Cooling in a Heat Wave
WARNING: SCIENCE CONTENT BELOW

How much you can cool a room using this method is dependent on the relative humidity on that particular day. The less relative humidity, the more water you can cool the room down. I found a quick and dirty formula for calculating the "Wet Bulb" temperature, which is the lowest possible temperature you can attain by evaporation alone given the current atmospheric conditions. It turns out that today's wet bulb temperature is 84 degrees, which will feel around 80 for me with the fans going - a bit hot, but definitely tolerable. The thermostats on the fans are holding at 85 right now. However, we haven't reached the hottest part of the day yet - I'll update later this afternoon to see how the experiment worked out.
DIY Evaporative Cooling in a Heat Wave

"Ohm Sweet Ohm" Decorative Plaque

ohmsweetohm2
A while back I received a plaque saying "Home is Where Your Story Begins." It was just a bit too kitschy and corny for display in our home, but I didn't want a gift to go to waste, so I re-imagined it with a geeky twist.

"Ohm Sweet Ohm" - complete with the Omega symbol and a lightning bolt is much more our style. I made it by masking over the entire plaque and then cutting out the letters with an x-acto, making an adhesive stencil. Hit it with some silver spraypaint (boy do I love spraypaint) and voila - geektastic!

Using the Internet to Get Free Stuff in the Mail

     In an earlier post, I mentioned how much I love sending and receiving mail through the good ole USPS. One of the ways I ensure that my mailbox periodically contains treasure when I open it, is by taking a few minutes every once in a while to fill out forms online to get free stuff sent to me. I'll do a bigger post soon showing the bounty I've gleaned in the past couple of years since I started doing this, but today I received two free magazine subscriptions with a juxtaposition that just made me chuckle.
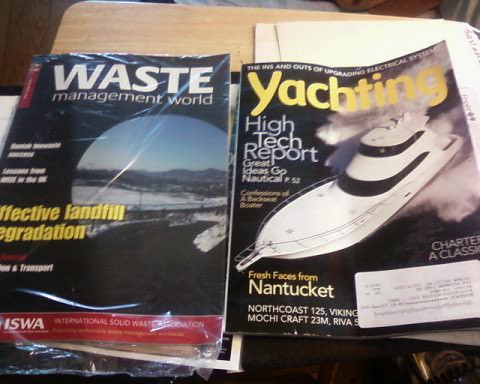
     Behold, my new bathroom literature, free copies of "Yachting" and "Waste Management World". I have vague interest in both of these fields (what with my semi-obsession with re-using and recycling, and a love of water since childhood) but it was just so funny to see these two gems sitting next to each other in the mailbox - what an unlikely pair!
     To get this free stuff sent to me, I use a few different websites that feed into my iGoogle. Beware, because some "Free Stuff" sites can be fronts for scams, but I've been using these ones for over a year and they have been reputable:
fatwallet

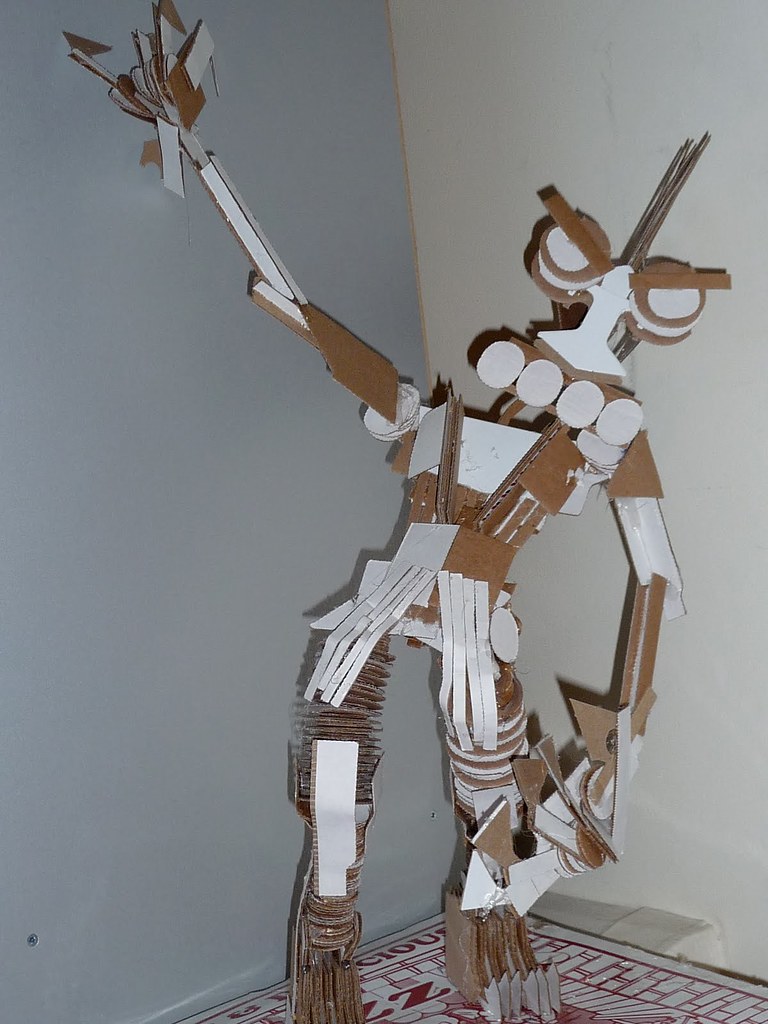
Papercraft (Cardboard Craft?) Pizza Box Robot Monster

     Recently, due to the hard economic times, I was forced to take a job as a pizza delivery driver to make ends meet. The work was tedious, but allowed my mind to wander to some productive places. I came up with some great ideas while assembling hundreds and hundreds of boxes in the basement. Leaving myself voicemails made Google Voice the perfect repository for my pizzeria pipe dreams.


     I'm guessing that pizza boxes are generally die-cut, and as is common in this process, the excess cuttings were sometimes still partially attached to the boxes in all manner of interesting shapes. To pass the time I started collecting them and thinking about what I could make with them. It soon became apparent that I had enough to assemble a mighty creature who could become a menacing mascot for the pizzeria. After four months of steady collecting, I had enough and put this guy together. Though not intended, I think he may be a cross between The Cybernetic Ghost of Christmas Past From the Future from Aqua Teen Hungerforce, and bad-ass Johnny Five from Short Circuit 2 after he re-assembles himself in the radio shack. 
     Alas, the pizza gig is over, and they did not adopt it as their official mascot. If you work at, or know of a pizzeria in the NYC area that might be interested in displaying my robot on their counter, leave a note in the comments.

But I'm only a hardware hacker....

Thanks for stopping by, especially if you came here via Boing Boing's Notepad page - their post there just beckoned for me to guess at their password, so I did.... I hope you like the projects I've been working on - no harm intended to the Boing Boing folks. When opportunity knocks....

Recycling Plastic Bags into Childrens' Blocks

I learned about the method of "stewing" plastic bags from this instructable a while back, and decided to try it for myself.  In short, it's done by placing the bags in canola oil, in which they acquire a gummy consistency, suitable for molding into rigid pieces. I decided to make some childrens' blocks out of it. As far as I know the plastic is all #2 HDPE which I assume is safe for children. Can anyone shed some light on this? (don't worry I wouldn't give this to kids until I'm absolutely sure).

The swirly, marbled patterns have potential, although just mixing all the different colors together make it ugly as sin. Perhaps in the future I'll use various color schemes and they'll come out nicer.

On further thought, what basically gets created from this process is plastic lumber . Perhaps I can hang onto all my #2 plastic and slowly make enough plastic bricks to build a house. :) or even better, raid the bins on recycling day and live within other peoples' waste. Oh the possibilities....

Check out build pics at my flickr page.